Westend
a premium Wordpress theme
- by:

Installation
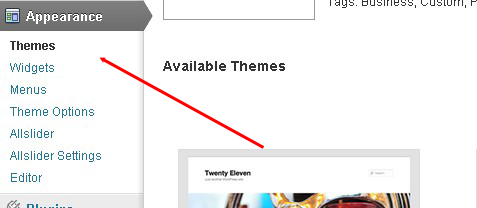
Thank you again for buying our theme. The first step is to install your new theme. Please upload the themesfolder into your wordpress intallation. Then click on "Themes".

Now choose the Theme and click on "activate" to install the theme.
Themeoptions
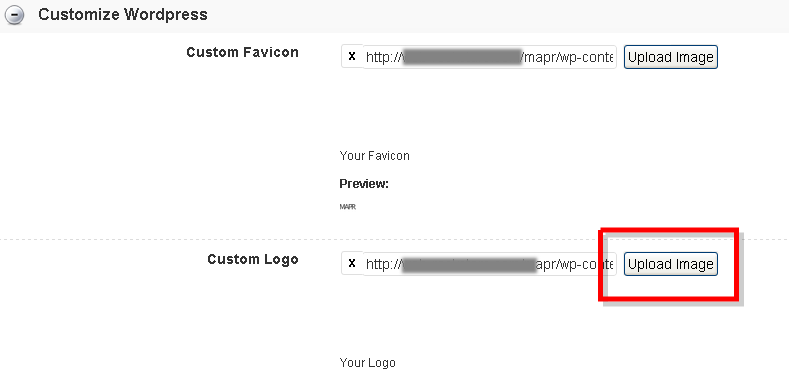
Klick on „Theme Options“ to configure the Theme.
Upload your own Logo and Favicon
Chance the Email for the contactforms:
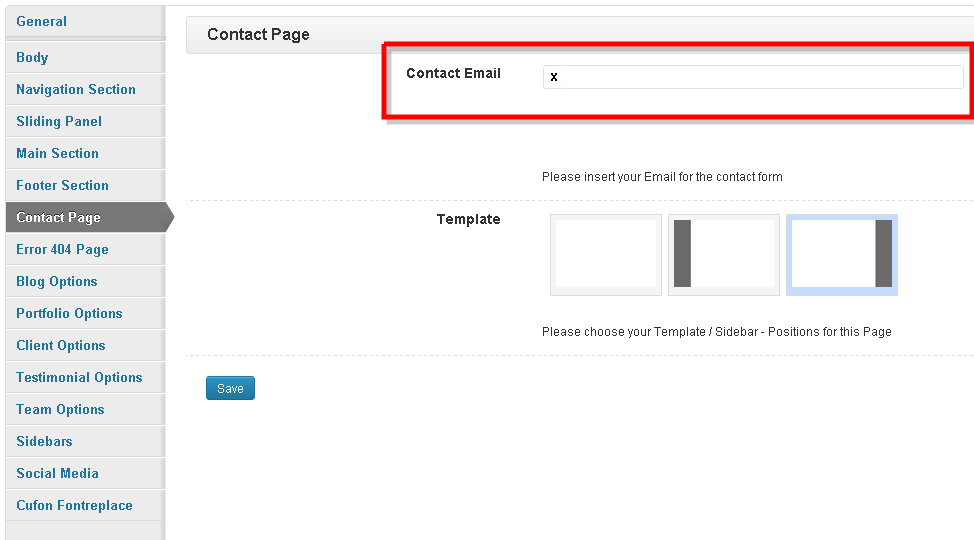
Now the most important things are done. After this Step, you can change the Fonts, Fontsize, Background-Images and -colors. Choose one of the Sections in the Admin Panel.
Themeprofiles
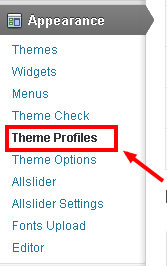
Our themes comes with a great feature: with "Themeprofiles" in the adminpanel you can use predefined colorshemes, save and reload your own, import and export your hole settings.
Click on "Theme profiles" to start the application.
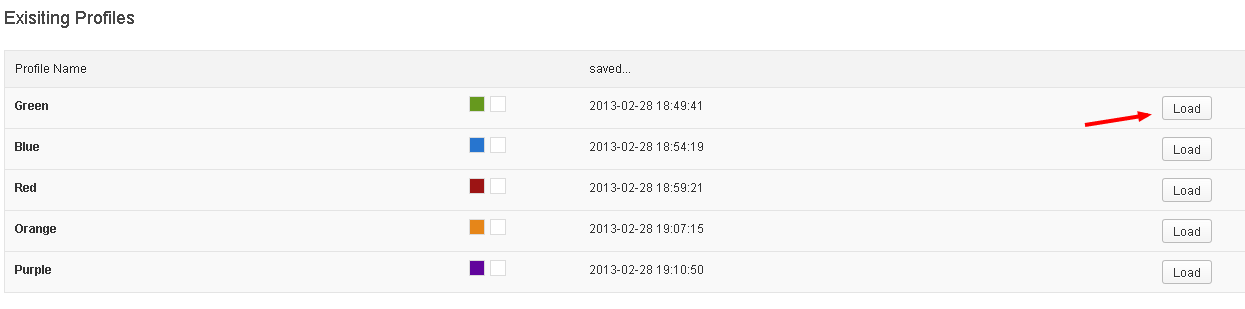
To save your Settings, please choose a unique name for the settings, for example "red", or "default". You can set two different colors for better recognition.

To load a predefined Colorshema or use ur own settings, please chosse a profile from the existing colorshemas and click on the "Load" button, all done.
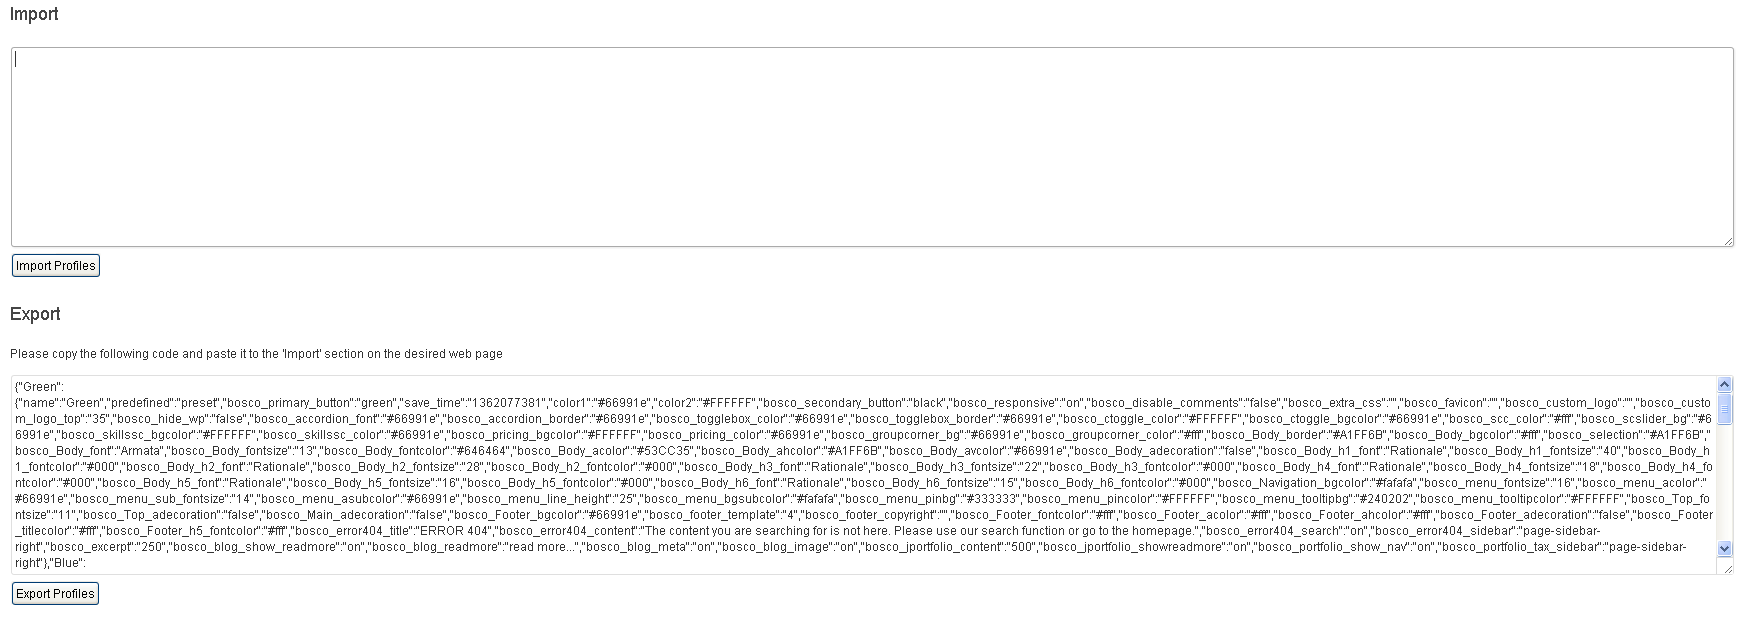
Also you can export and import all your settings, for example if you wish to change your server or something else. Click on "Export" to get the preformated Data. Copy this data. To import this on another site, please put this data into the "Import" textarea and click on the "Import Profiles" Button.
Sidebars
Our Themes comes with unlimited sidebars. This means, you can create so many sidebars you need.
To create a new sidebar, go to the adminpanel ("Themeoptions") and click on "sidebars".

To create a new sidebar, choose a unique name and click on the "Save" button. Now you can find the sidebar in the "widgets" section and the sidebar can be used in all posts, pages and post types like portfolio or testimonial.
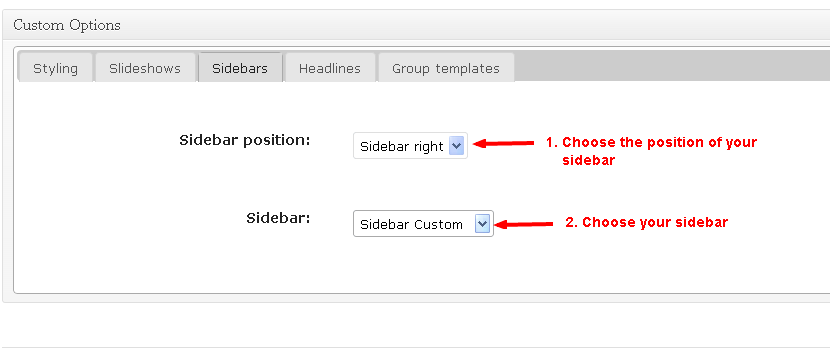
To choose a custom sidebar for a post, click on "Sidebars" within the "Custom Options" of the post, choose the position for the Sidebar (left or right) and then the sidebar.
Shortcodes
All out themes comes with a lot of shortcodes. To easy use the shortcodes, we´ve created a shortcode generator and a few usefull "Ready tu use Plugins" in the Editor (Screenshot).
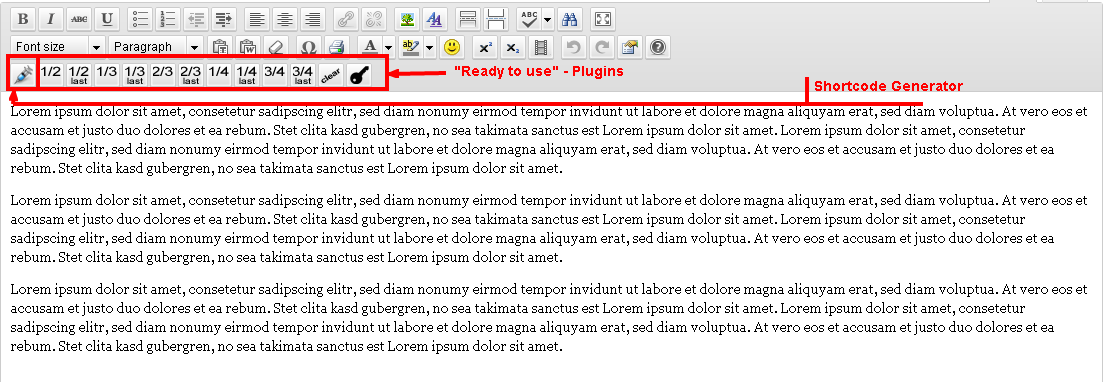
To use the shortcode genetor, click on the shortcode geneator button.
Democontent
To use the democontent from our demosite, just upload the democontent file.
1. Step
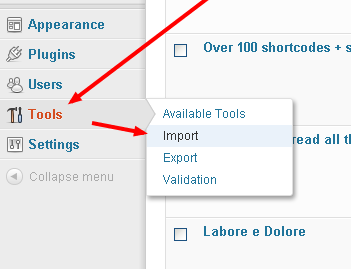
2. Step
3. Step

4. Step
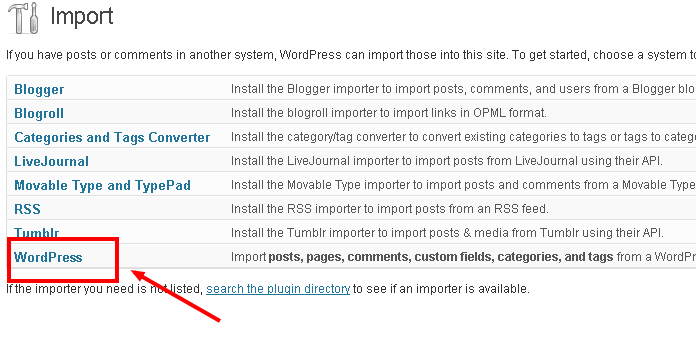
NOTE: you must have installed the Wordpress import plugin (http://wordpress.org/extend/plugins/wordpress-importer/).
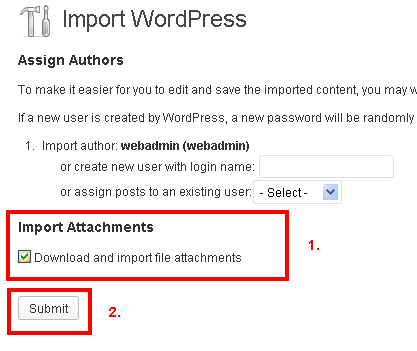
NOTE: Often we use many big pictures in our themes, so the import can take more time as your server can handle. If come after 30 Secondes a error message, press the "F5" Button on your keyboard to load the site again. After a while the import will be work completely with all images.
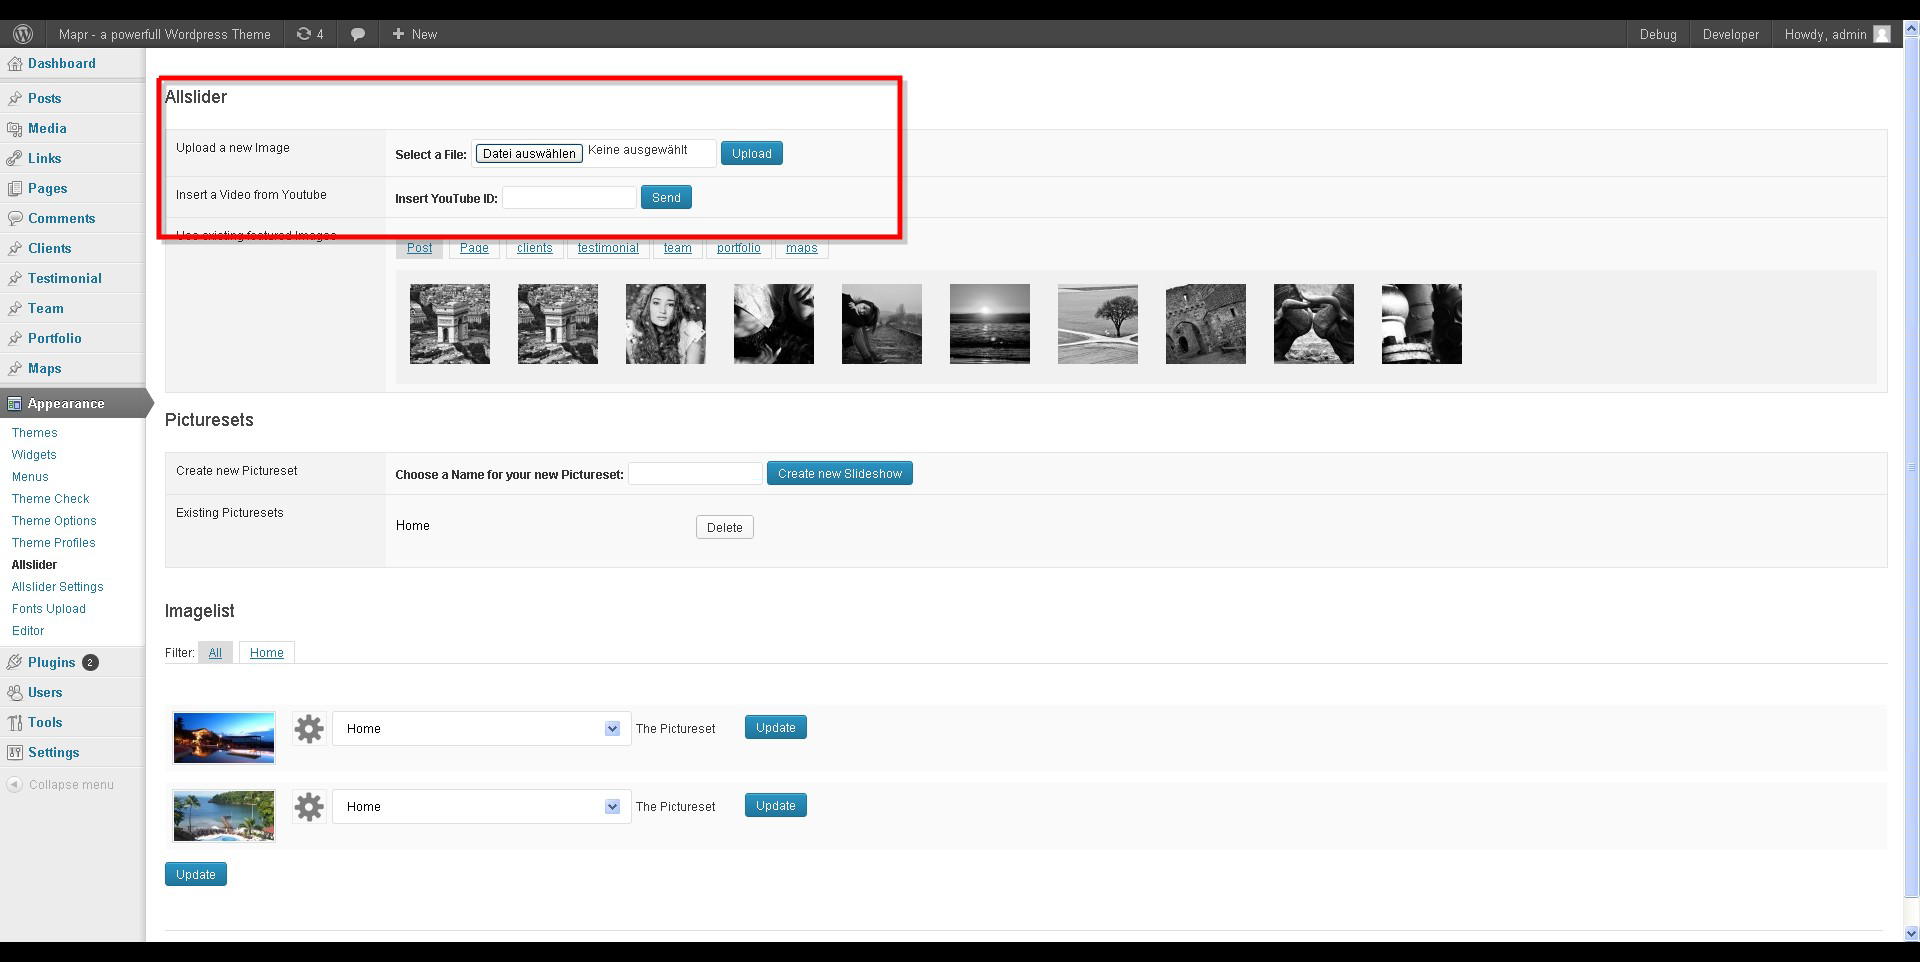
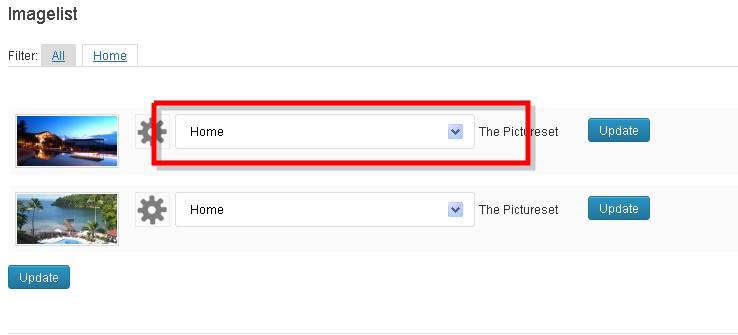
Allslider
For the Slideshow in the theme we use our "Allslider". Follow the steps to use it:
1. Step

Portfolio
To create a new entry for your portfolio, go to the Wordpress adminpanel, in the menu on the left click on "Portfolio", and then on "Add new".
Now you can add a new description / content for this entry in the editor. The "Main image" for a entry is always the featured image. Click on "Set featured image" to upload a new one.
To display your portfolio entrys on your site, you have to use the portfolio templates. Create a new page and choose one of the portfolio templates. You dont have to add content on this site.

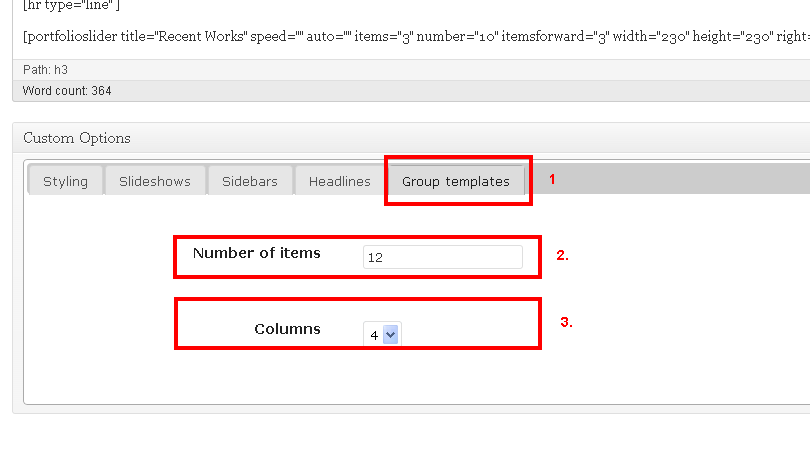
Now you can change the options for this template. In the "Custom Options" section you find some Settings in the "Group Template" tab. Here you can set how many items should be shown on this page and how many columns should be used.
Mapslider
The Mapslider is a great solution for showing your produce, images, portfolio and what ever you want. In the next steps you will see, how to configure the mapslider.
1. Step
Go to the adminpanel, click on "Maps" in the Wordpress menu on the left side and then click on "Add new".
The first step is very important. Please set a "featured image". This is the background for your slide. Click on "Set featured image" and upload a image or choose an existing image.
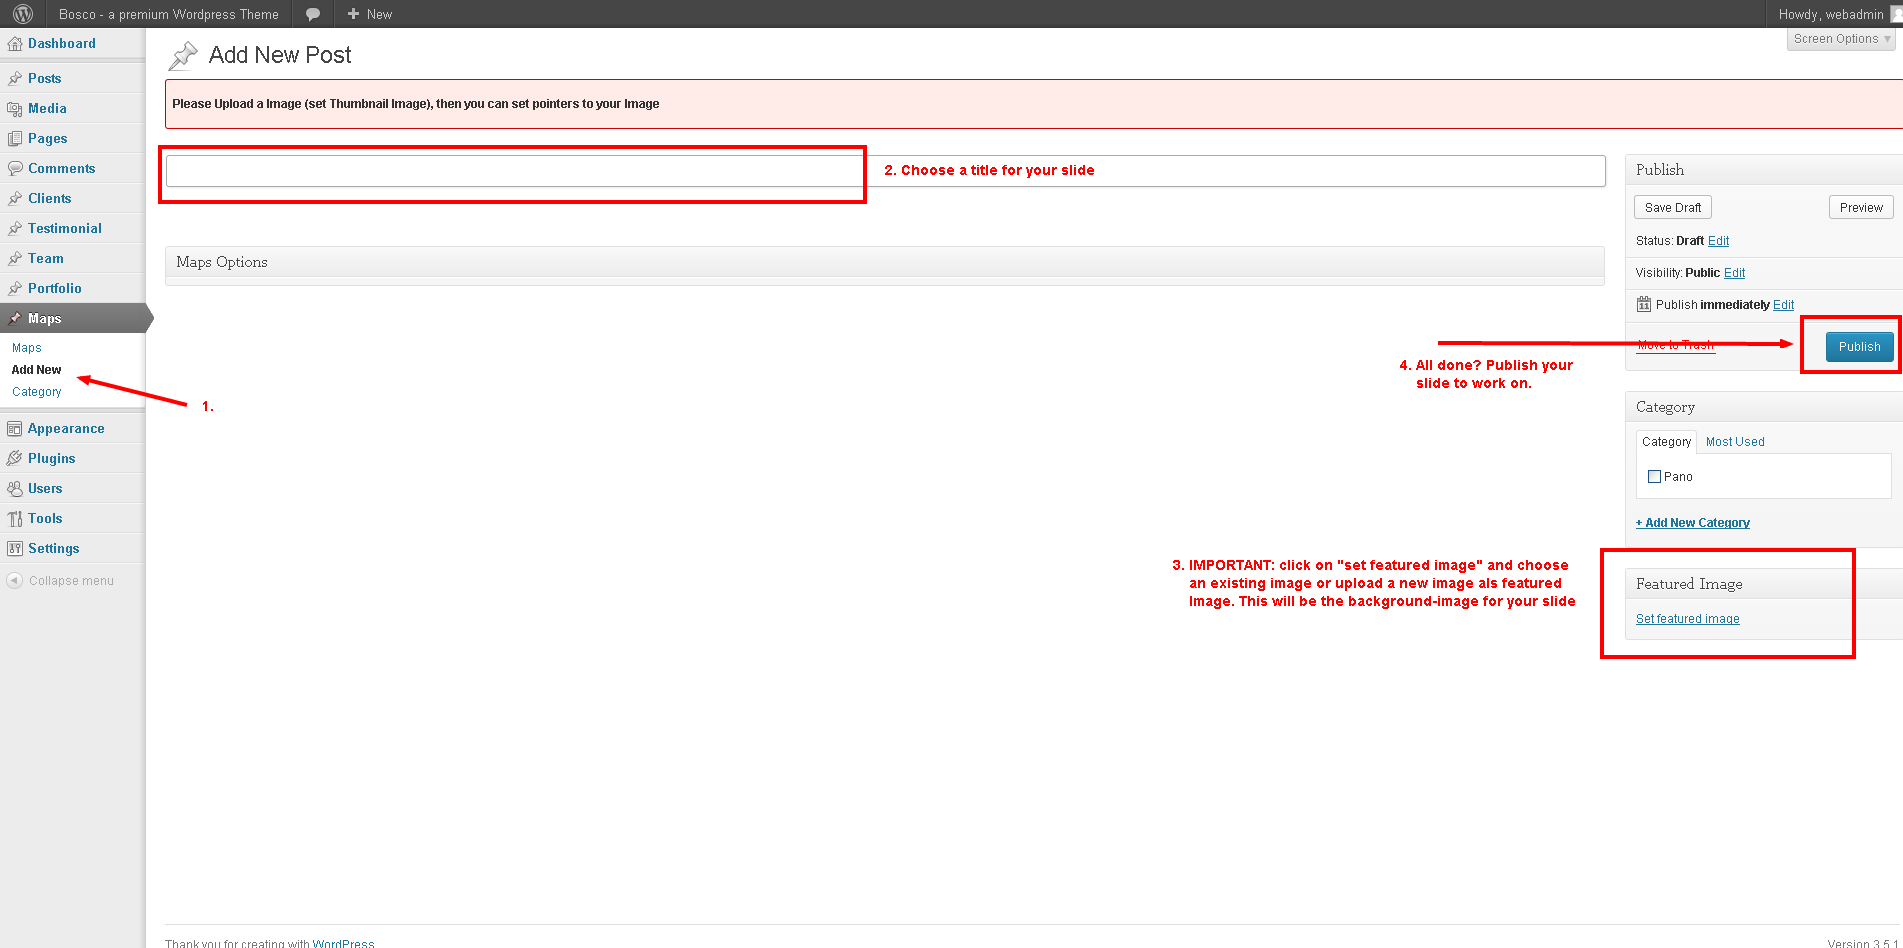
All done? Publish or save your map to work on.
2. Step
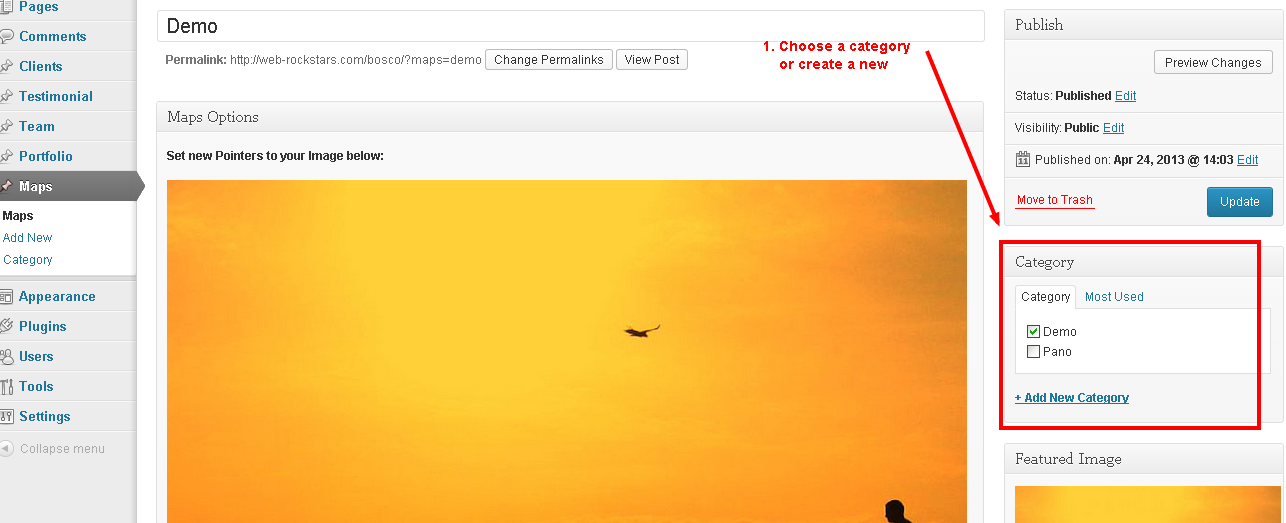
Choose a category or create a new one. Later, you can choose from wich category the mapslider get the slides.
3. Step
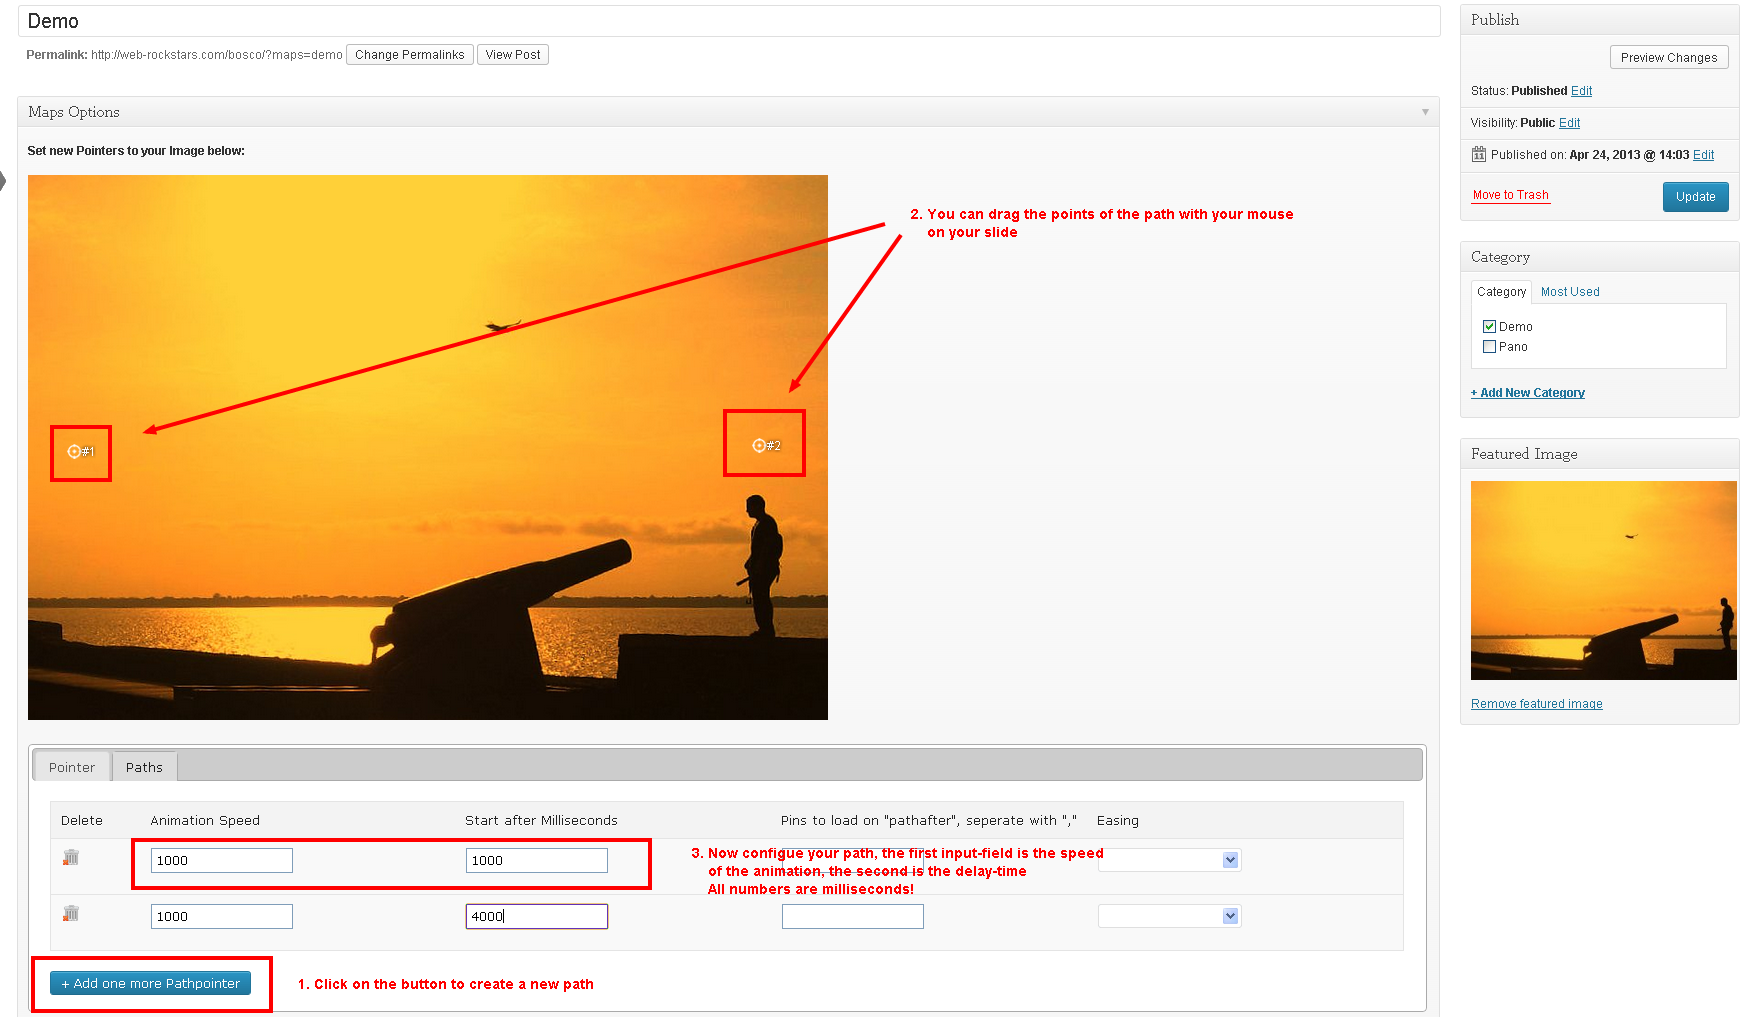
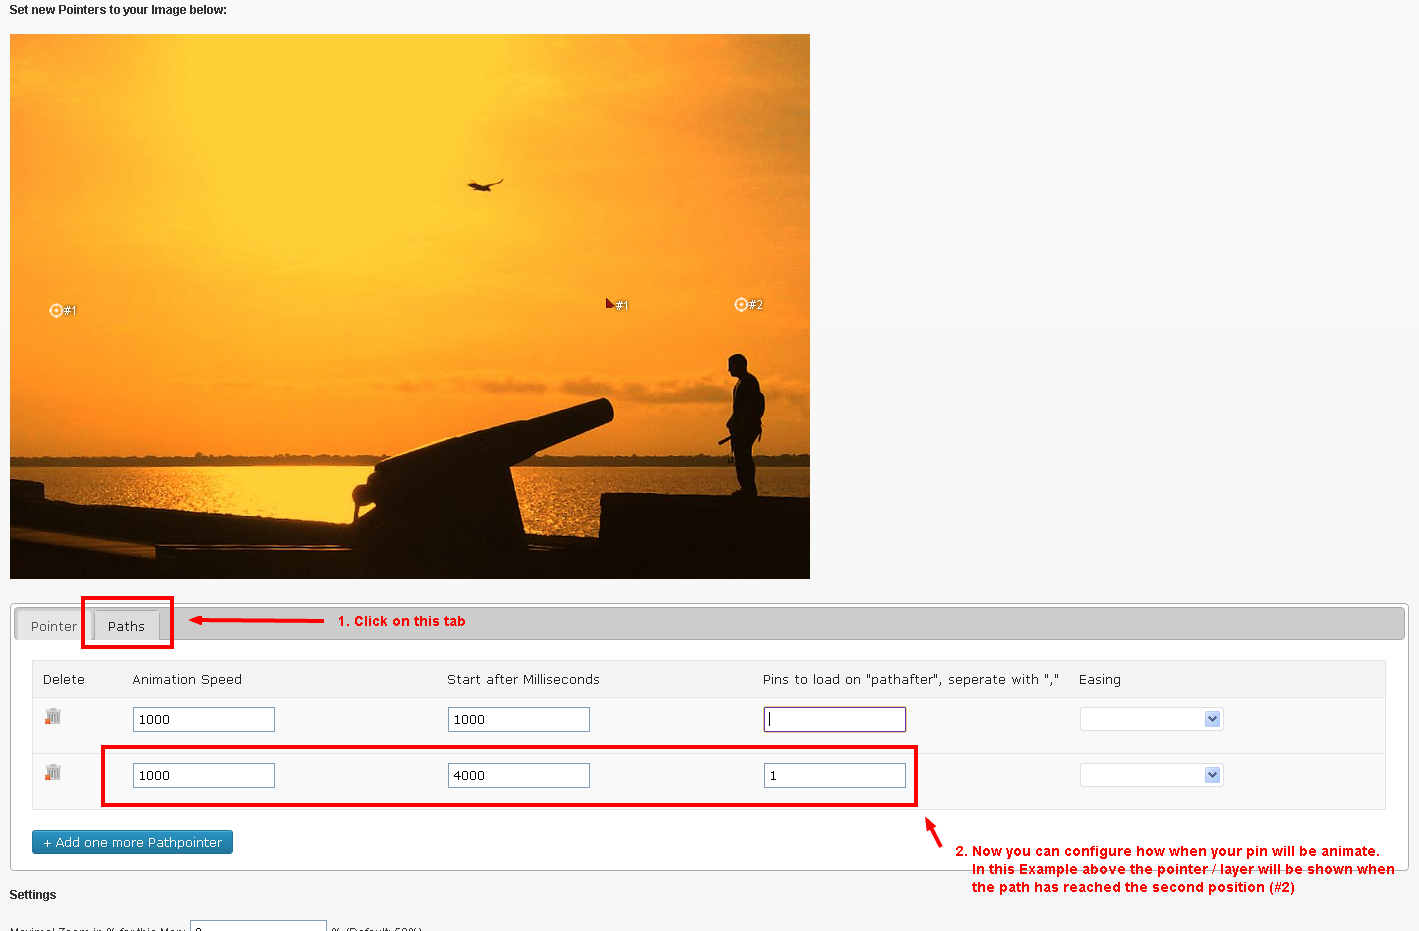
If you want to let your slide "drive around", you have to use pathes. Its very simple, click on the "Paths" tab, and then on the "Add one more Pathpointer" button. Now you can see a pointer on your map / image. With your mouse you can drag this pointer. Put it on the place you want to slide your slider. The first pointer is allways the "Startingpoint" for the animation. To let the slider "drive around", set a second pointer on your slider. Now the slider will drive from your first point to the second one.
At the bottom you can configure each path, set here the animation speed in milliseconds, the delay for the start and (if you want) the easing type.
4. Step
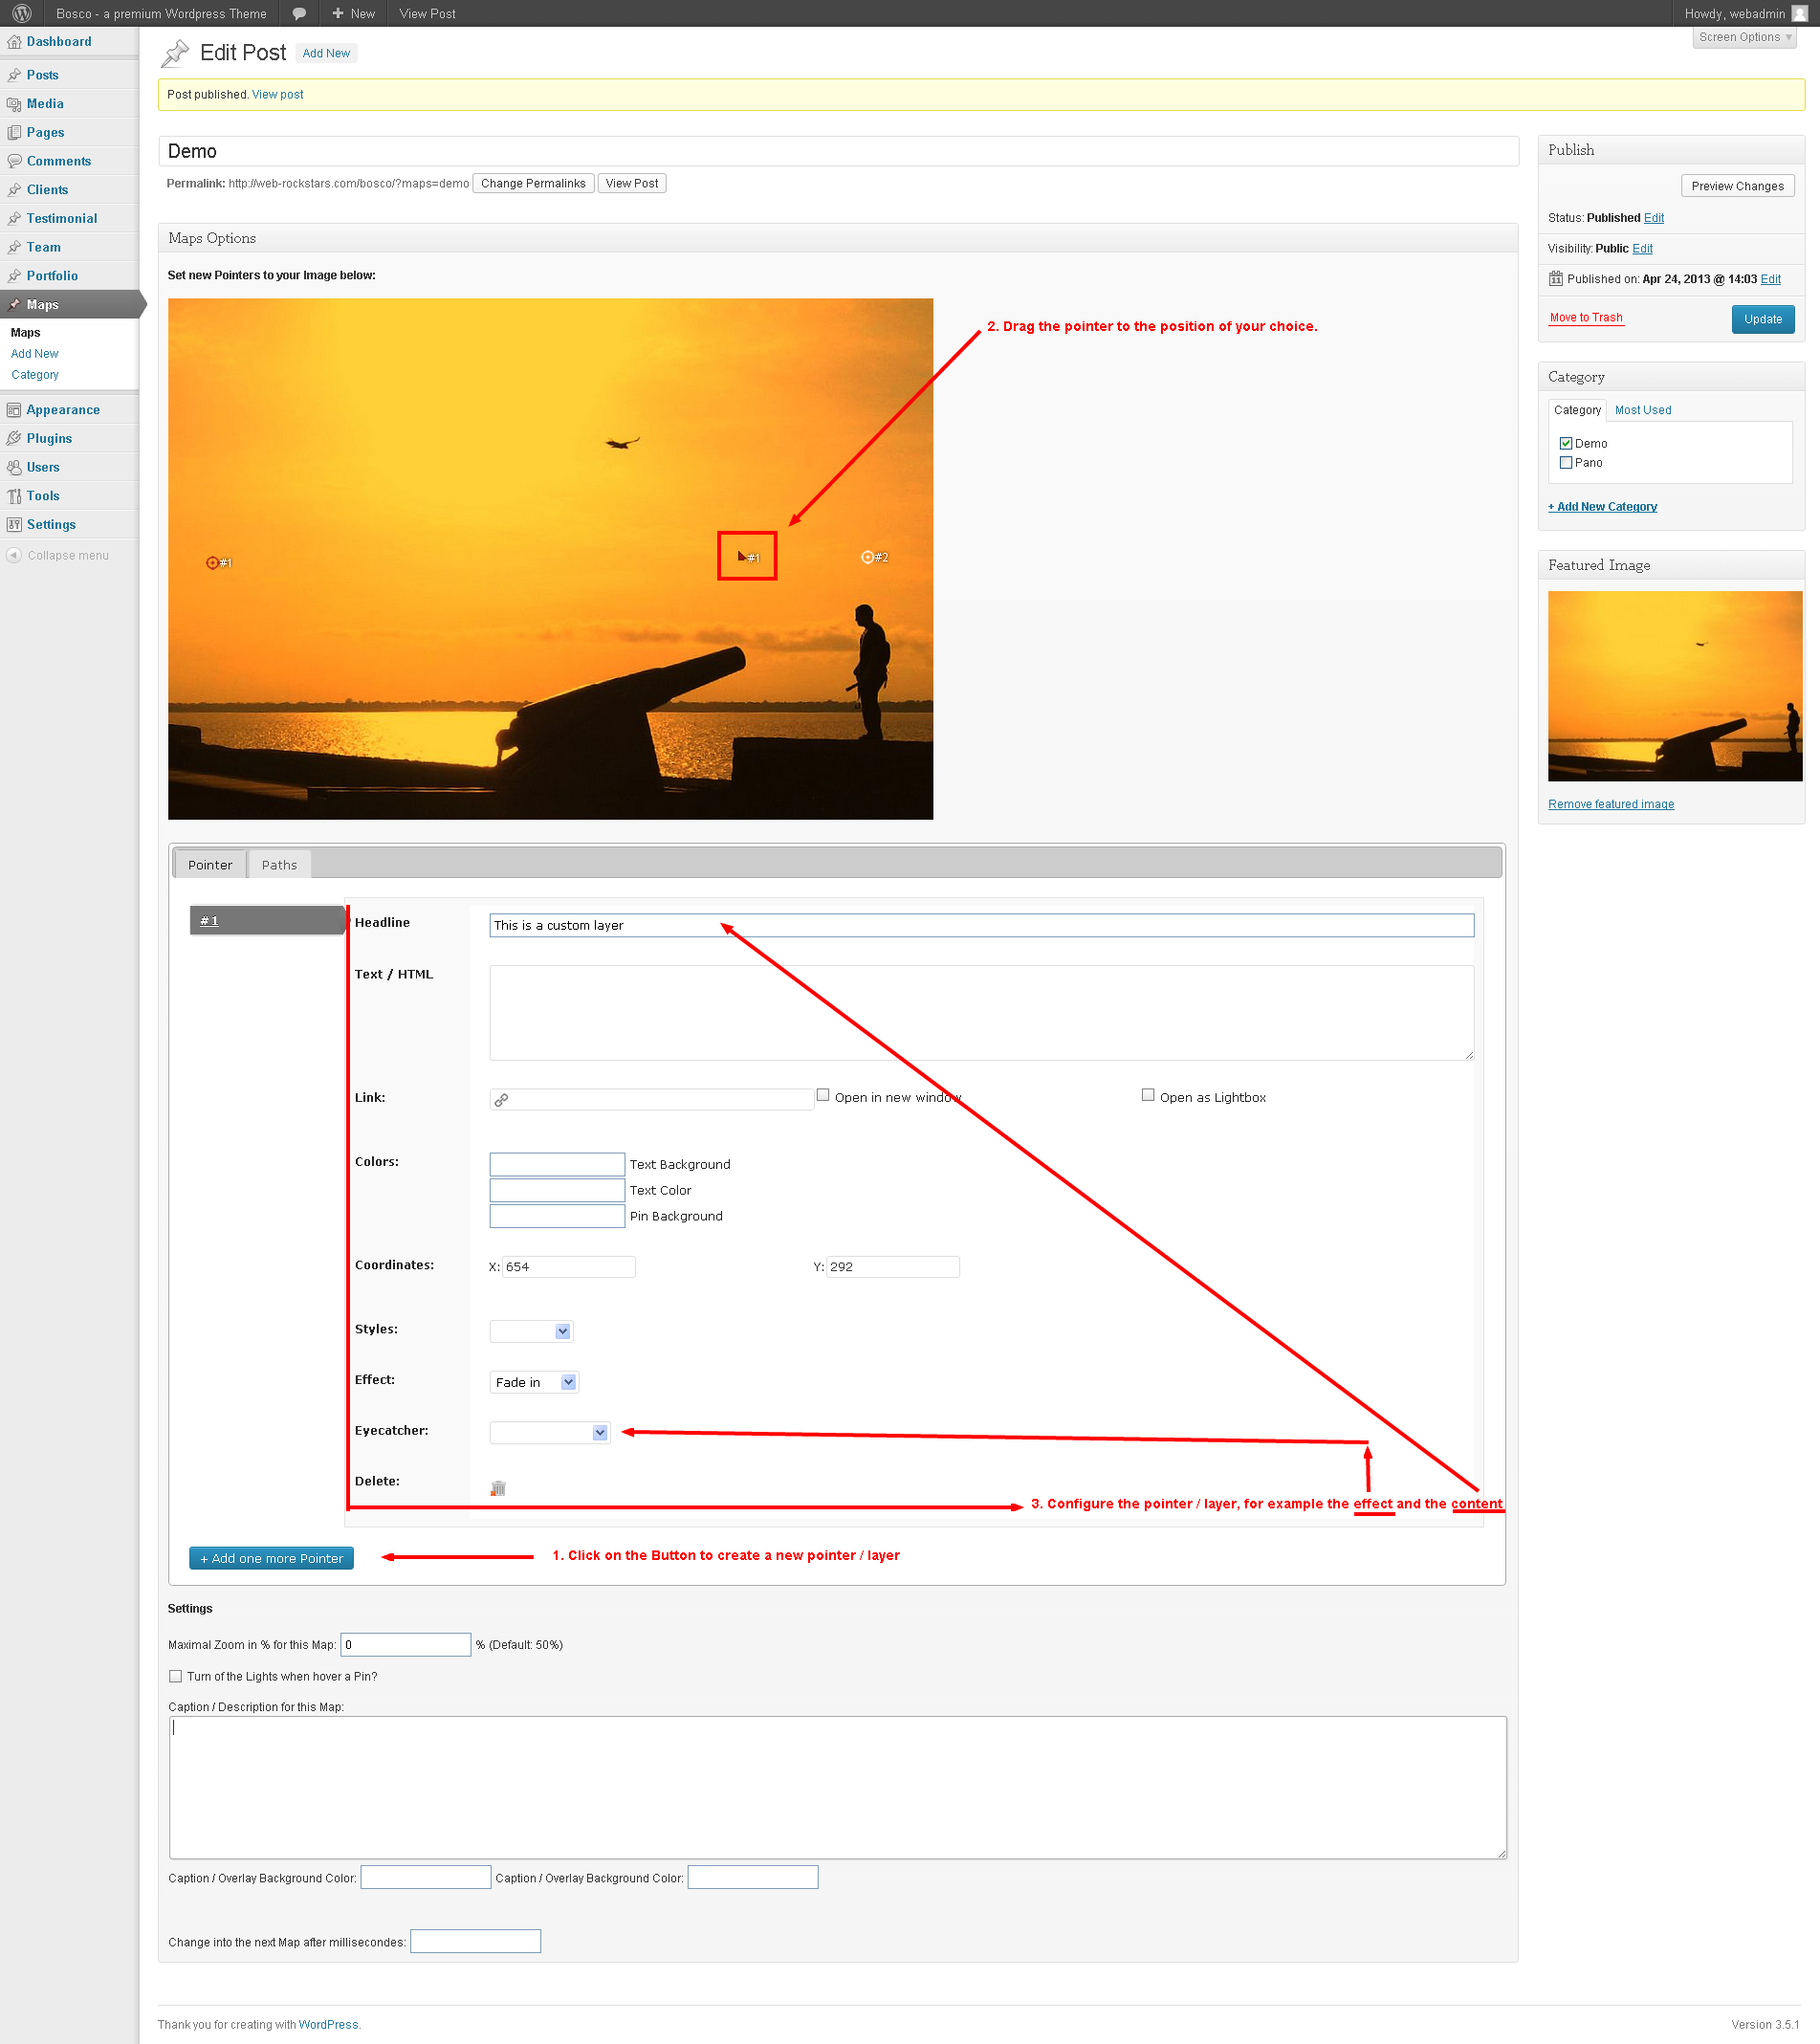
If you want, you can add some pointer (predefined) or layers to your slide. To do this, click on the "Pointer tab", and then on the "Add one more Pointer" Button. Now you´ll see another "Pointer" on your slider. Also this type of pointer you can drag with your mouse on the choosen position.
If you´ve choosen your position, you can change the settings of your pointer, like "Effect", "Colors" or add a link.
5. Step
You can hide the layers / pointers of a slider until a path goal is arrived. Click on the "Paths tab", and insert the ID of the pointer / layer in the "Pins to load on pathafter..." field. If you want to set more then one layer / pointer, seperate the ID´s with a ",".
The ID of each pointer / layer you´ll find on the slider itself or in the list of your pointers / layers.
6. Step
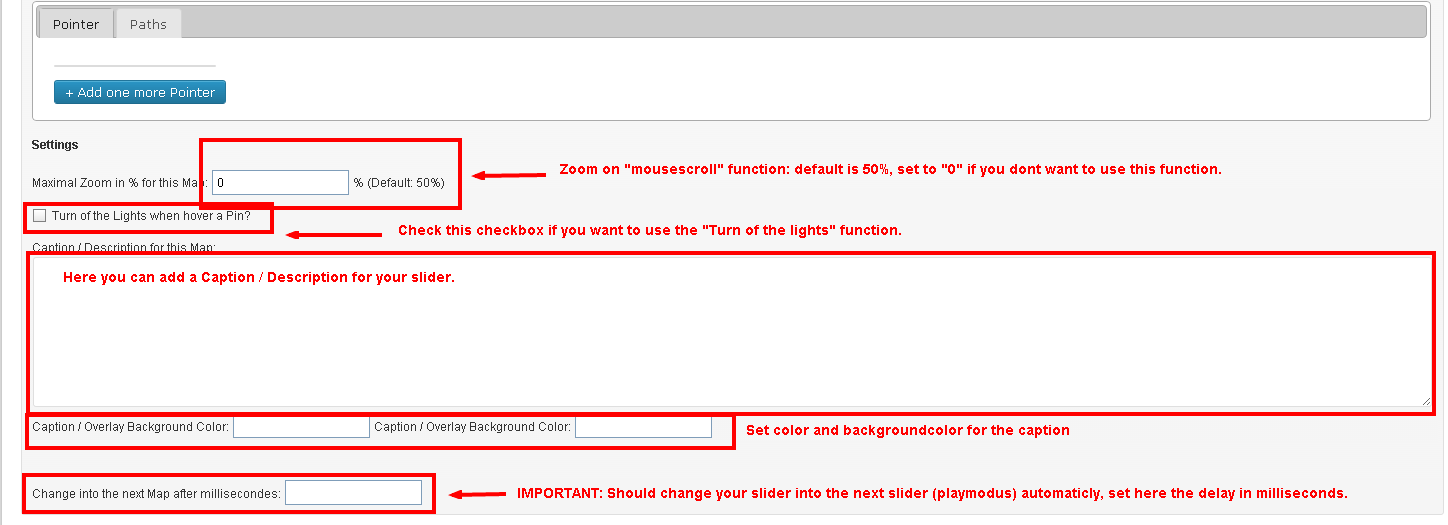
You can set a few different options for your slider, for example "Caption", automatic changes between the sliders and the possible zoomfactor.
7. Step
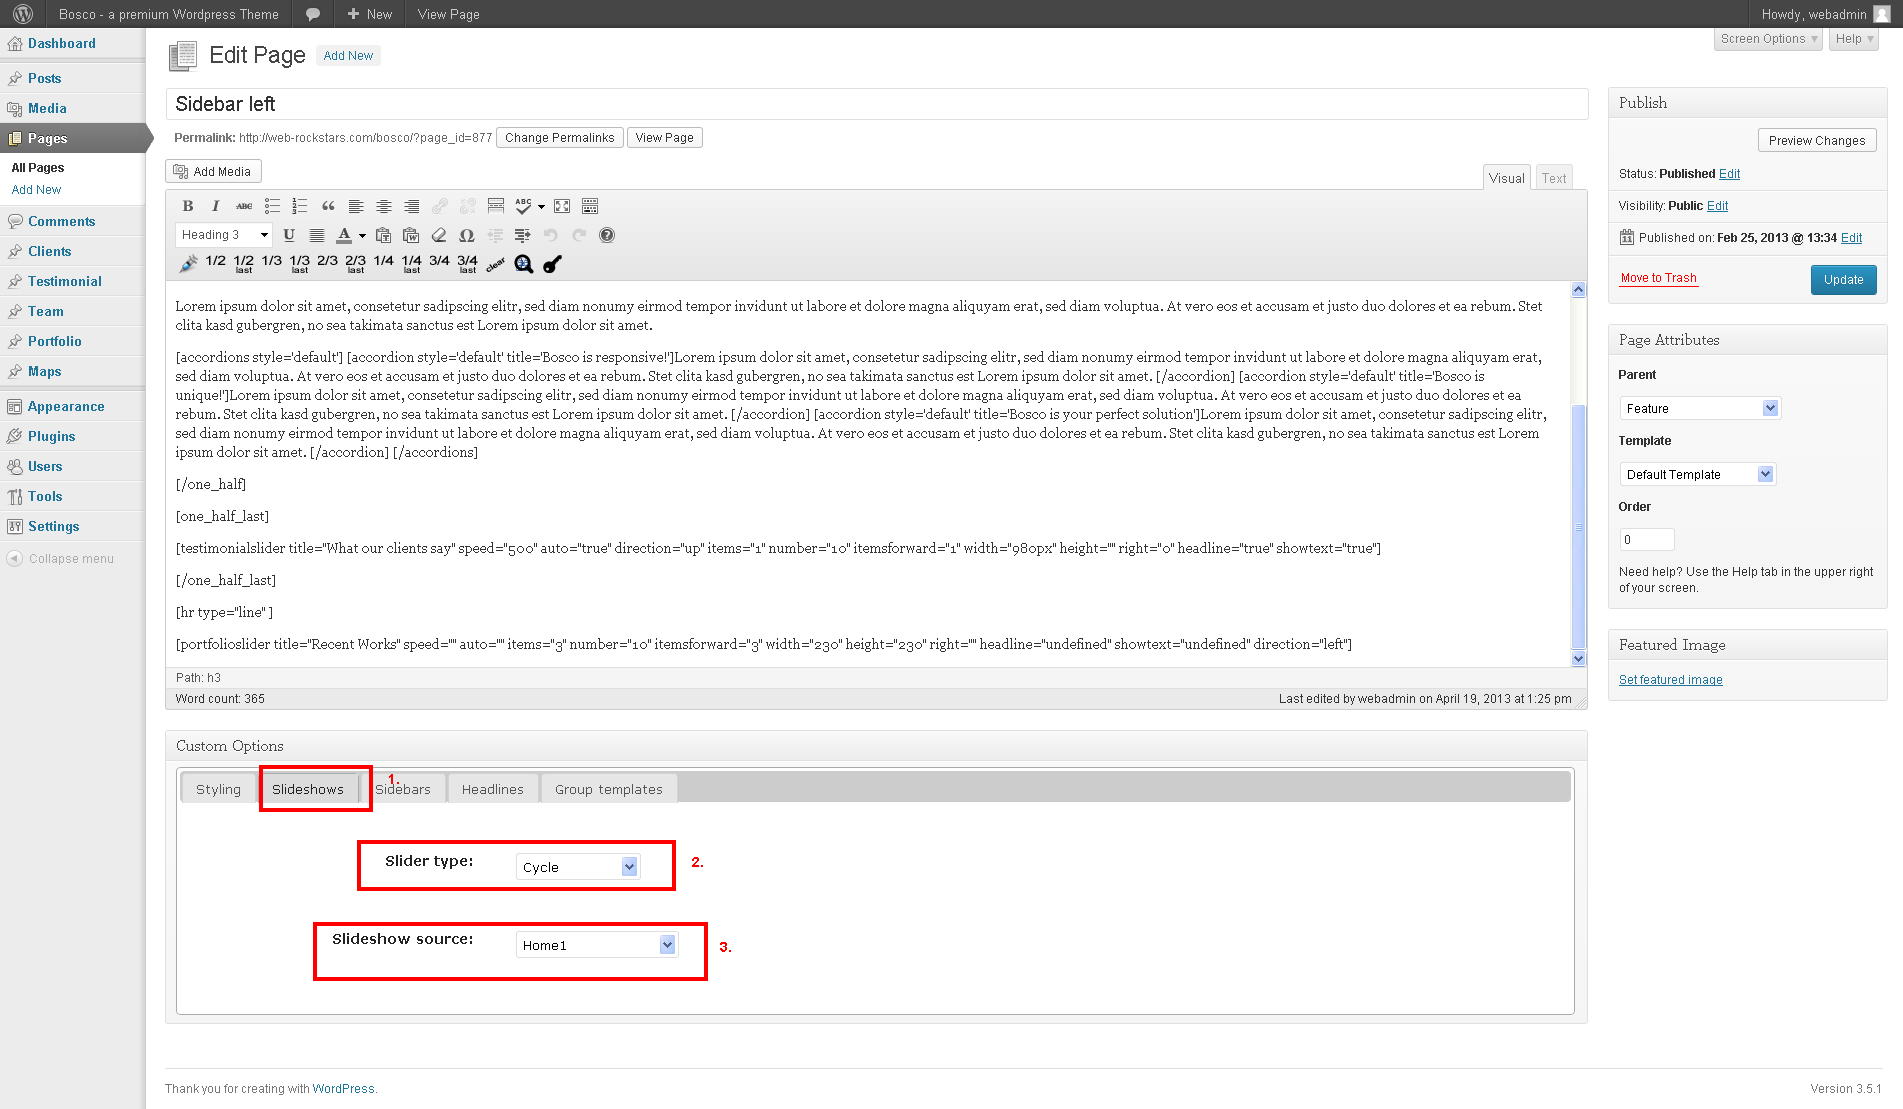
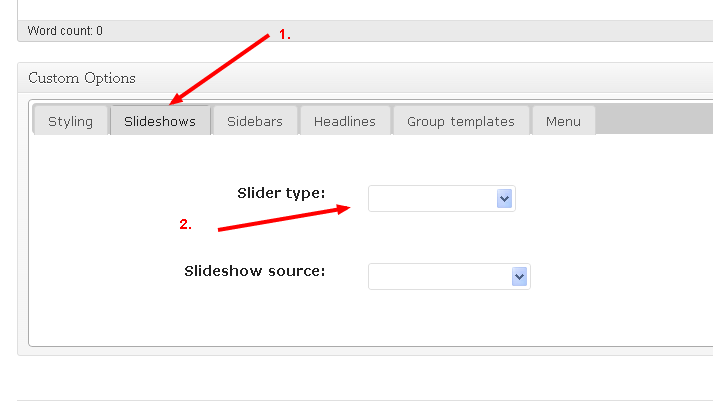
To use the mapslider for a post, go to the "Custom Options" Settings at the bottom of your editor, click on the "Slider" tab, choose "Mapslider" for "Slider type" and one of your mapslider categories in the dropdown field.
Quickgalleries
Quickgalleries is a fast way to show some images on your website. To create a new Quickgallery, go to the WordPress admin panel, create a new page and choose the "Quickgallery" templace. Then, click "Add Media" and upload some pictures.
Shortcode
You can use the pictures of a page or post also with a shortcode. For example: you create a Quickgallery and want to show some pictures from the page on your homepage.
Therefore you can use the quickgallery shortcode:
[quickgallery id="XXX' count="XXX" cols='XXX']
COUNT: The Number of images to show, for example 6
COLS: The number of columns for your quickgallery, a number between 2 and 4
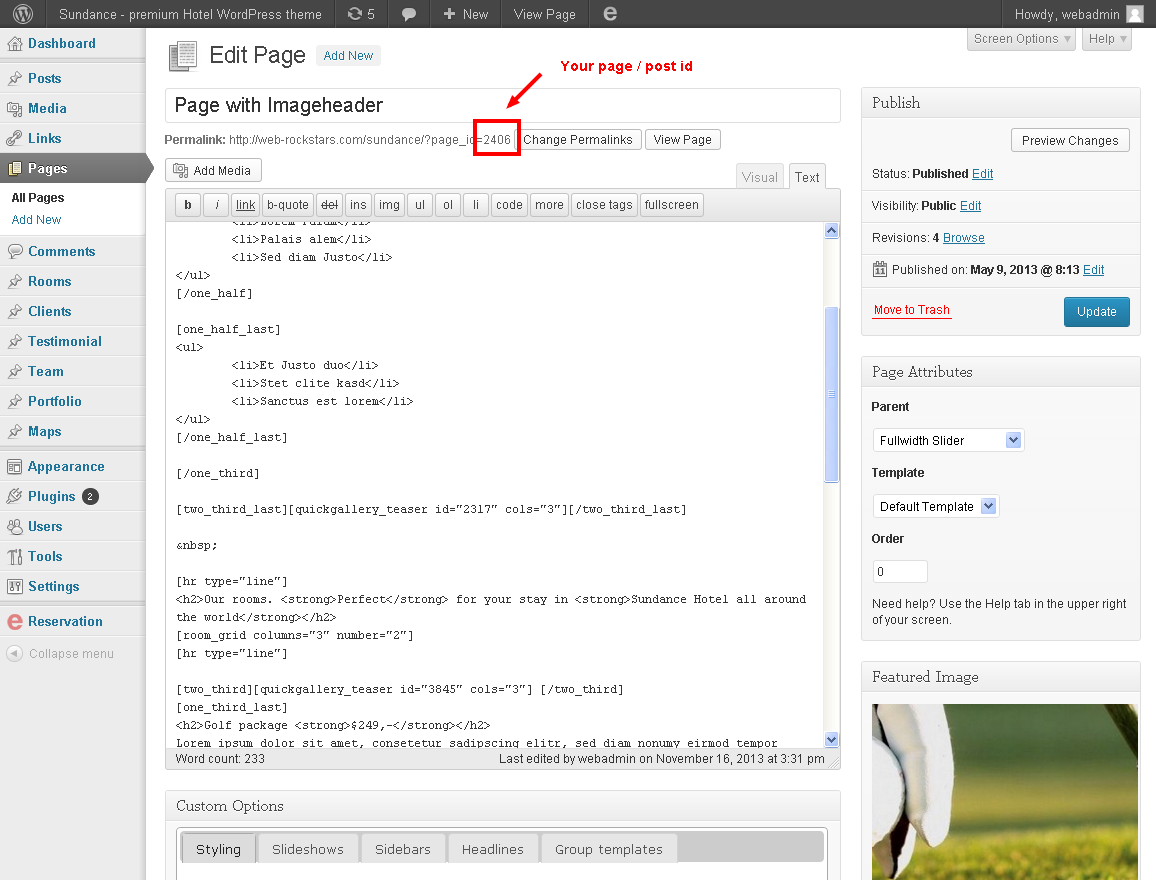
ID: The ID from the page where the images are attached. You can find see id here (see Screenshot):
Real Estate
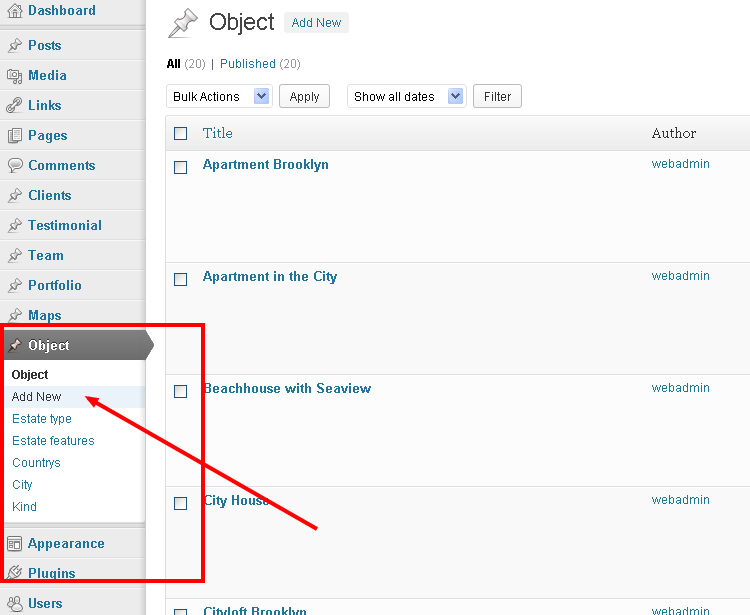
To display your properties, first you have to create the properties. Go to WordPress admin section, click "Object" > "Add new".
Now we can create a new entry. Plese fill in all required Information.

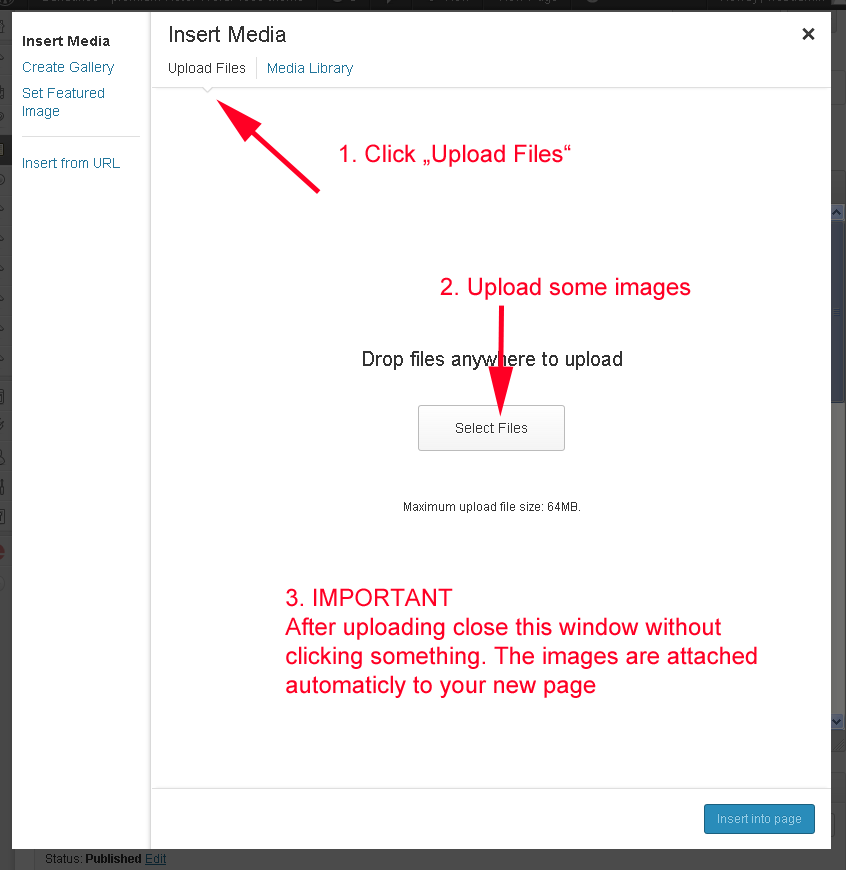
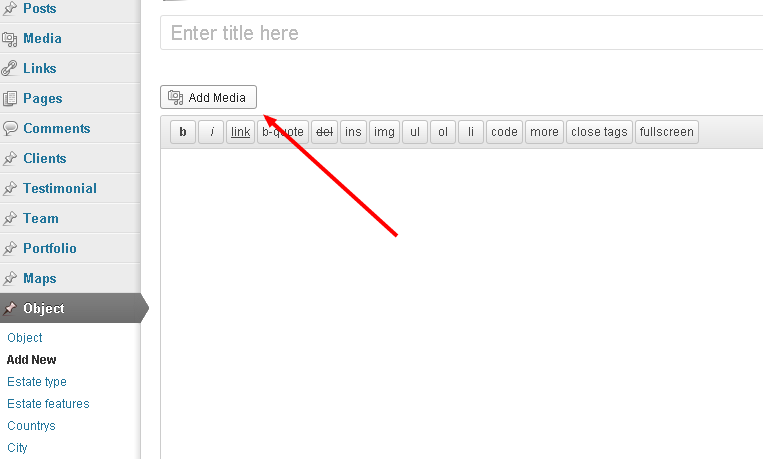
How to attache images
Click "Add Media", "Upload Files" and select some images from your computer to upload them. After you dont have to do anything, close the window, click on "Publish" and all is done.
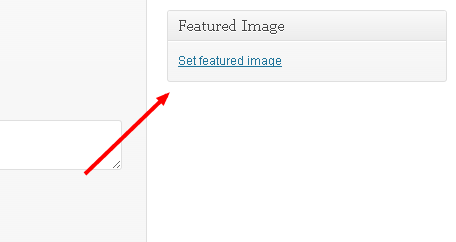
Set featured image
To set the featured image for an object, click on "Set featured image", upload an image or choose an image from the media library and click "Set Featured Image". The Featured image is used for the preview image, for example within the gridview / listview of your properties.
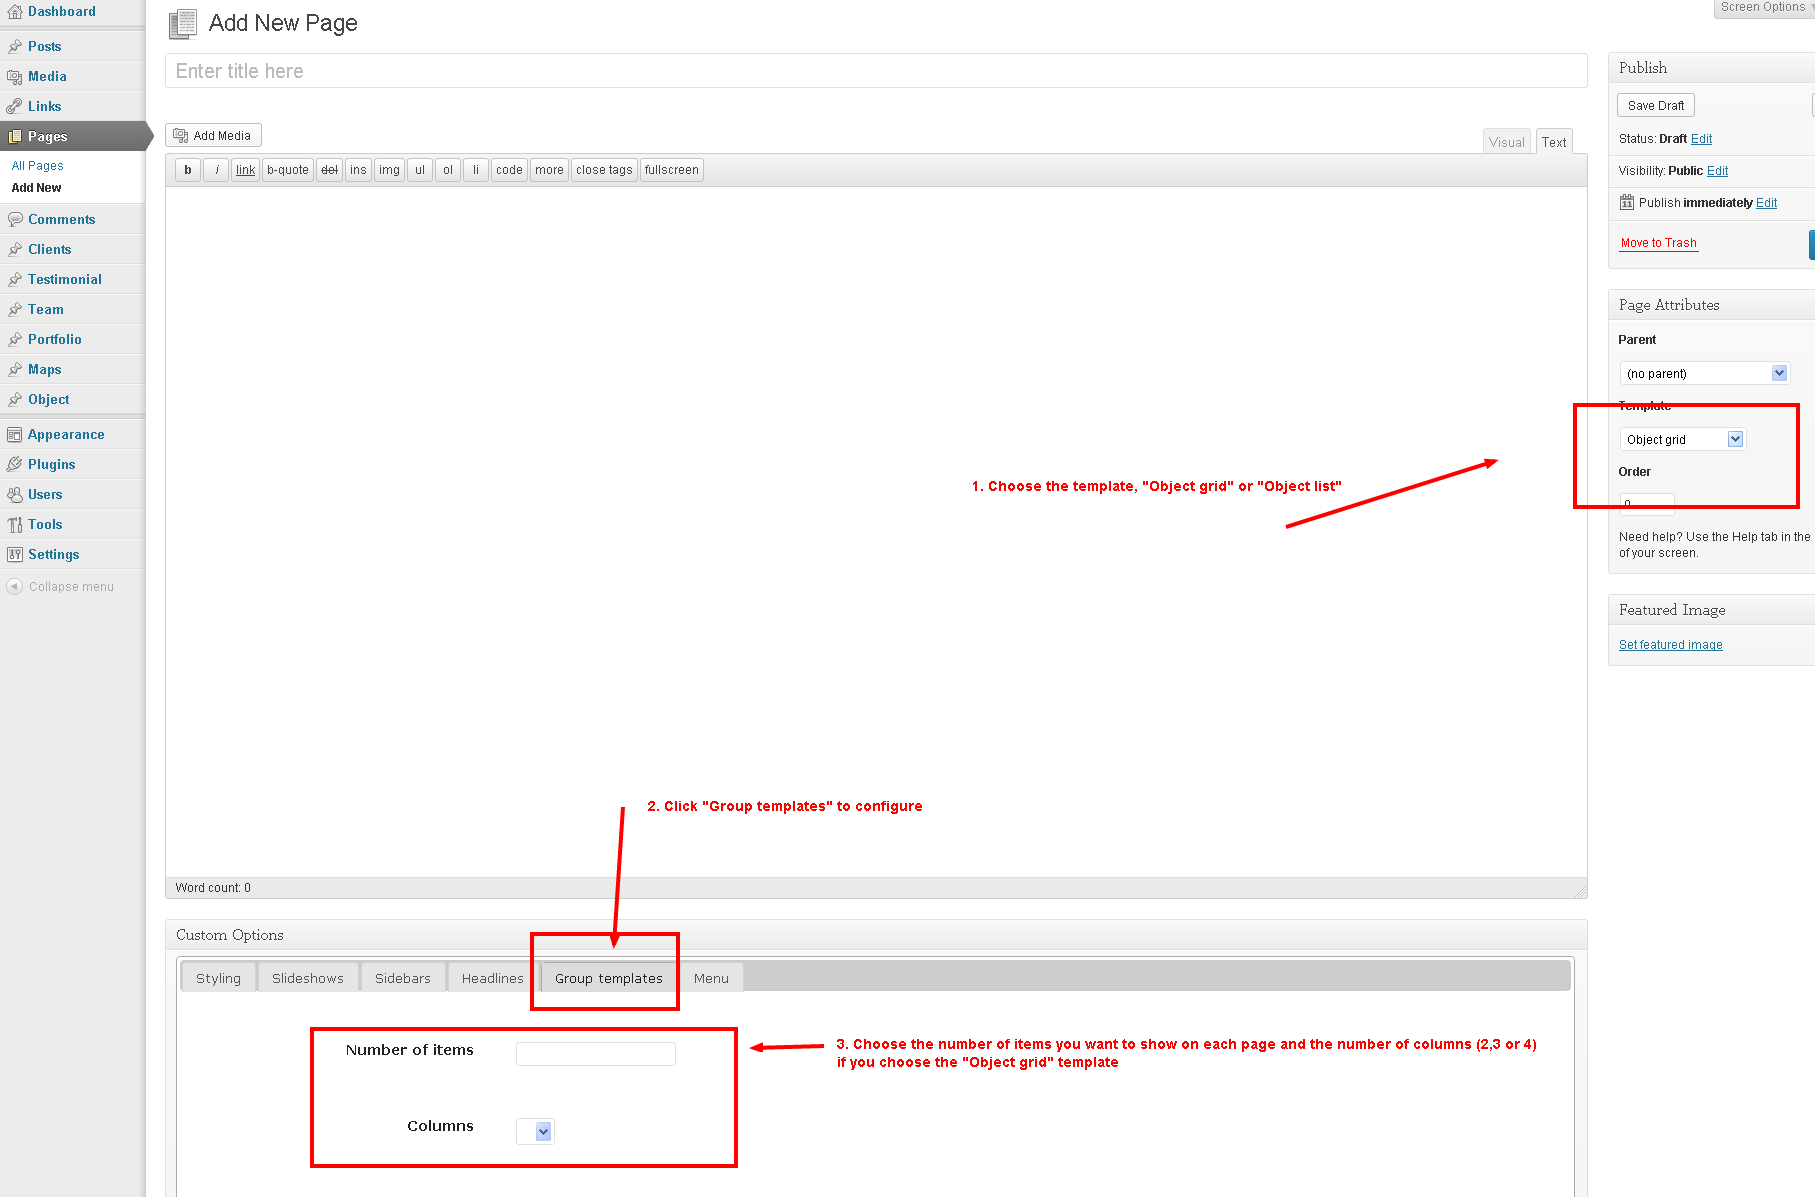
How to display my objects?
There are many different ways to show your objects. The easiest way is the listview / gridview. Create a new page, choose for template "Object grid" or "Object list", choose the number of items you want to show on each page and the number of columns (2-4) if you choose the "Object grid" template.
Shortcodes
There are some special real estate shortcodes.
Estate Map
Displays a map with your properties
[estate_map height='x']
height: the height of the map
Search
Displays a property search
[search_real_estate]
Single property list view
Displays a single property with list entry template
[estate_listentry id='x']
id: the ID of your property
Single property grid view
Displays a single property with grid entry template
[estate_entry id='x']
id: the ID of your property
Grid view
Displays a grid with your real estate items
[estate_grid columns='x' items='x']
columns: the number of columns, 2,3 or 4
items: the number of items
List view
Displays a list with your real estate items
[estate_list items='x']
items: the number of items
Featured properties grid view
Displays a grid with the featured properties
[estate_featured_grid items='x' columns='X']
items: the number of items
columns: the number of columns for the grid (2,3 or 4)
Featured properties list view
Displays a list with the featured properties
[estate_featured_list items='x']
items: the number of items
Property Teaser
Displays a teaser from a property by id
[estate_teaser id='XXX']
id: id from your property
Slidershows
The are two different slideshows for your real estate properties. While creating / editing a page / post you can choose a slideshow below the editor.
Choose "Objects" to show your recent entries, choose "Featured-Objects" to show your recent featured entries.